2022/11/17 (updated 2022/11/27)
The focus of this guide is on pitch deviation, and how to modify pitch in Synthesizer V Studio. It is assumed that you know the basics of adding notes and entering lyrics/phonemes. This is not a guide on tuning or writing melodies, as those are separate topics.
Much of the information presented here is still accurate, however Instant Mode is no longer part of Synthesizer V Studio.
See the unofficial user manual for information on the successor features introduced in version 1.9.0: Sing Pitch Mode and Rap Pitch Mode.
Additionally, the pitch transition and vibrato sliders are now only accessible when using Manual Pitch Mode.
Note ornamentation, parameter editing, auto pitch tuning, and AI retakes all remain unchanged.
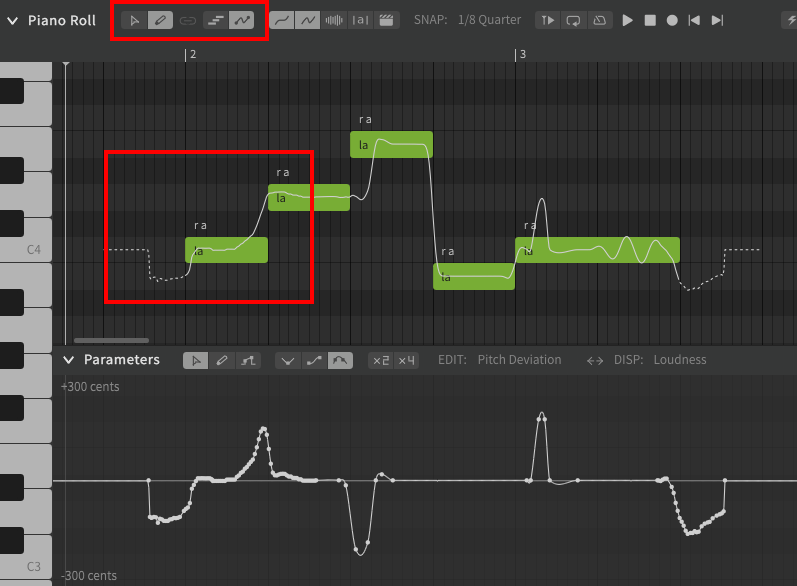
Pitch in Synthesizer V Studio is represented as a grey/white line in the piano roll. The pitch line is based on the notes present in the track/group, and during rendering the synthesis engine will attempt to generate output that matches this white line.
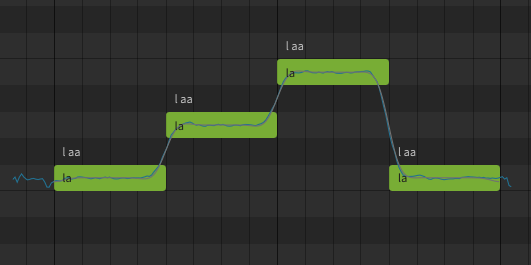
Standard (non-AI) voice databases will also show a blue line that closely follows the white pitch line. While the white line shows the user's desired pitch, this blue line indicates the resulting pitch once the synthesis engine has finished rendering.
Since Standard voices are based on actual audio samples that are pitch-shifted and stretched to match the user's input, they often do not exactly match it. This is rarely an issue from a user perspective, as the blue line is usually within a few cents of the target pitch.
AI voices do not show a blue line because the output they generate is completely new and therefore better able to match the target pitch without risk of distorting the original sample with aggressive pitch-shifting.
Pitch deviation describes any feature or technique that causes the pitch line to deviate from the exact path of the notes in the piano roll.
Human vocalists do not sing the exact notes written on the sheet music. They introduce transitions, vibrato, and other variations to make the performance more emotive and engaging. For this reason, many producers also introduce pitch deviations to their synthesized vocals to make them sound less "robotic" and more "realistic".
Even if human-like realism is not your goal, learning to effectively use the pitch deviation tools available within Synthesizer V Studio will be a major step in achieving your desired sound.
The focus of this guide is explaining the pitch deviation tools and the effects they have on the rendered output so that you can achieve your own goals. This guide will not tell you which settings or pitch curves are "best", since the desired results will be different for every song and each producer has different preferences.
Just like how different vocalists have their own singing styles, different vocal synth producers tend to have their own tuning styles. You are encouraged to experiment with the options available in order to find the type of pitch deviations that sound best for you and your musical aesthetic.
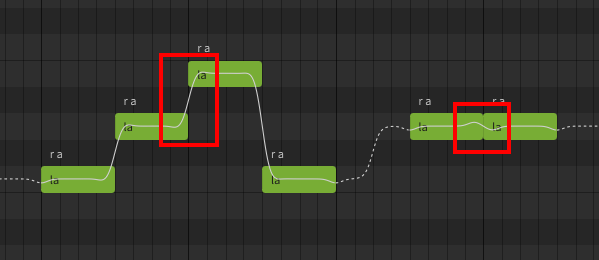
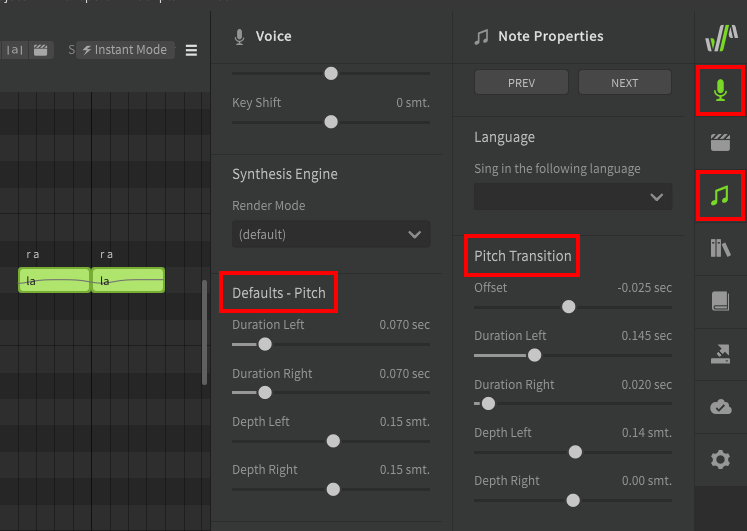
You might have noticed that SynthV Studio includes transitions between notes by default, where the pitch does not follow the notes exactly in order to create a more smooth sound. These transitions are even included when two adjacent notes are of the same pitch.
These transitions can be adjusted in the Note Properties panel, and the default pitch transitions for the entire track/group can be adjusted in the Voice panel. Take note of how these sliders change the pitch line where notes meet.
This is the first and most basic form of pitch deviation in SynthV Studio and it can be a helpful way to customize your "base pitch" and establish a starting point for additional changes.
It is good to be aware of the pitch transition settings, however many producers will find the defaults to be sufficient since many of the tools discussed below will give more control over the pitch transitions. It is for this reason that it has been used to demonstrate the concept of pitch deviation rather than having its own chapter in the guide.
Understanding the tools available to you will help you achieve the sound you want, however you do not need to know all of these tools nor do you need to pursue a specific sound if you don't want to. Making music is supposed to be fun, so assuming this skill isn't something you need for paid work, focus on the parts you enjoy and skip the parts you don't.
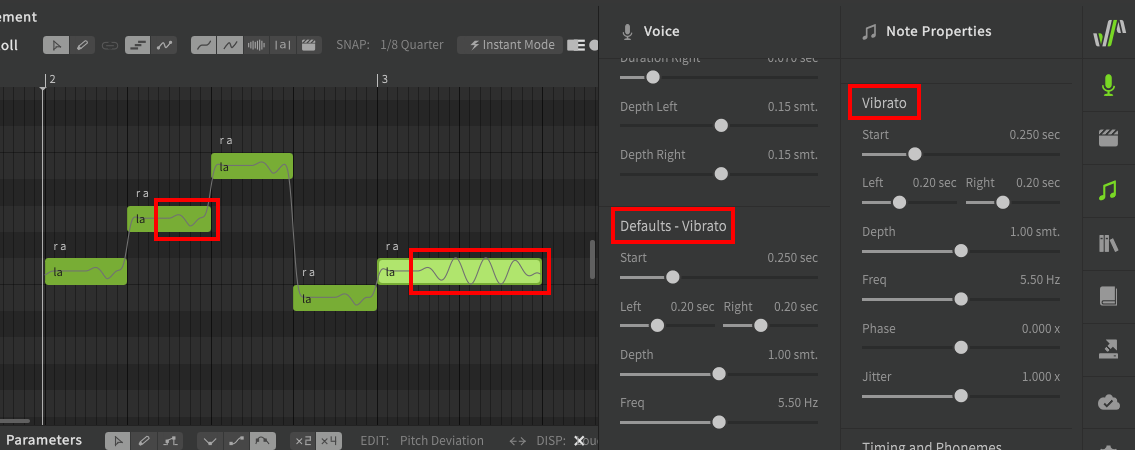
Vibrato is a powerful tool which helps add variation to long notes (and sometimes short notes), which can help them sound more natural. Good use of vibrato is usually a major contributor when listeners describe a vocal as "emotional".
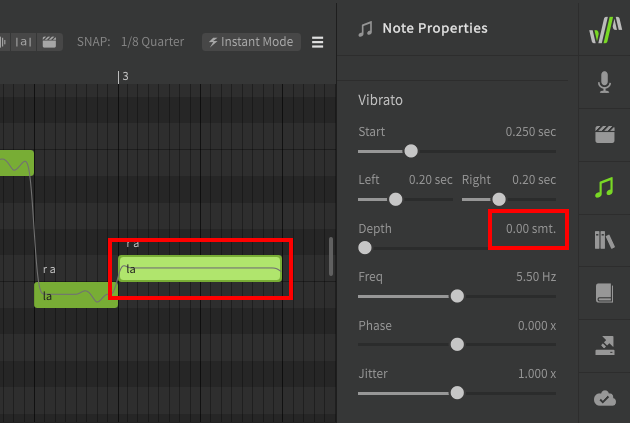
SynthV Studio does add some vibrato to notes by default, however it can sound unnatural if every note has the exact same vibrato. For this reason many producers will change or outright remove this default by reducing the default vibrato depth to zero in the Voice panel.
The vibrato settings offer a quick and easy way to add relatively customizable vibrato to notes, however this method also:
Just like how human vocalists do not match their pitch to the sheet music exactly, they also do not sing with vibrato that matches a perfect sine wave or is consistent across the duration of a note.
In many cases the limitations listed above will not be significant enough to be problematic, and you can always make adjustments later to add variation to the vibrato.
The "Jitter" option is supposed introduce minor fluctuations in vibrato to help it adhere less to a perfect sine wave, however in my experience this has had minimal effect when using AI voice databases.
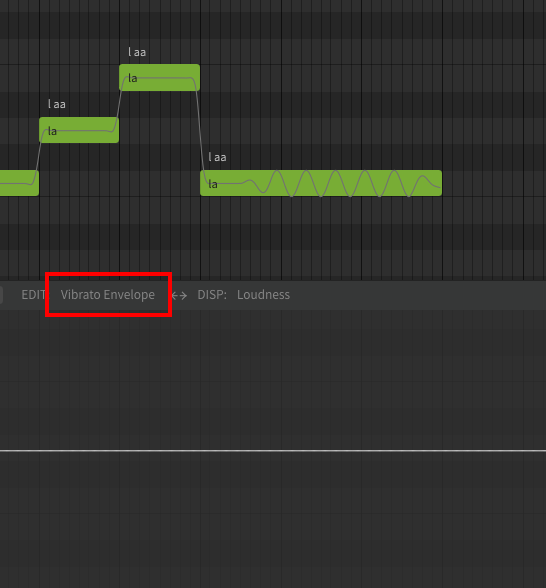
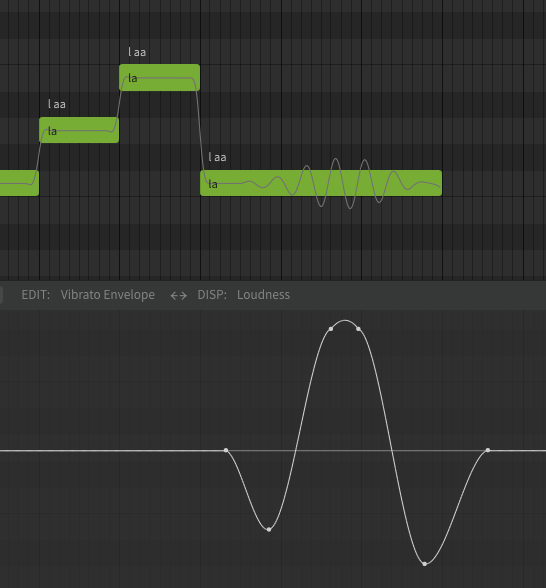
The vibrato envelope parameter can be used to increase or decrease the amplitude (depth) of the vibrato over its duration. These examples show the difference between the default vibrato, and a vibrato envelope parameter which increases the depth toward the midsection of the note and reduces it at the start and end.
Only the vibrato depth is affected by the vibrato envelope parameter, and it can only modify the depth to be between 0% and 200% of the original setting.
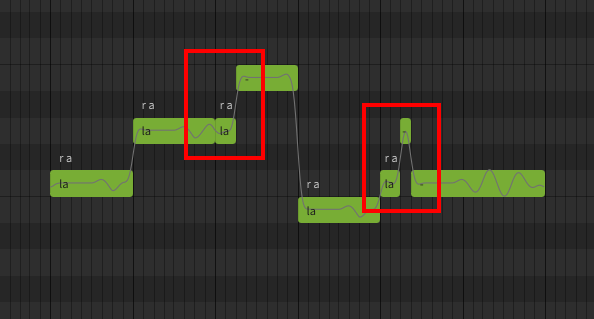
Note ornamentation (sometimes referred to as "note bending") is a technique where a note is split into multiple smaller notes to introduce pitch deviations. Note bending can be an easy and powerful way to introduce variation into your melody, with the added benefit that it is very visibly evident how and why the pitch line has changed. The main disadvantage of this technique is that the note transitions can end up very repetitive without additional adjustment.
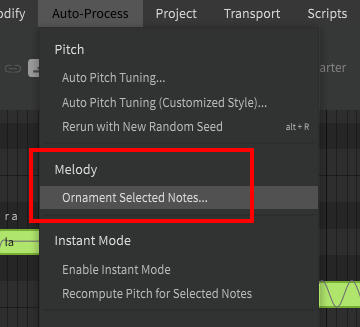
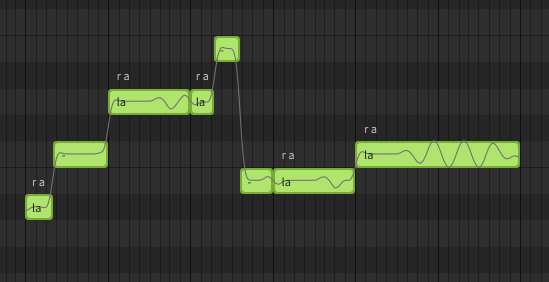
Pro edition users also have access to an "Ornament Selected Notes" option under the Auto-Process menu. This option will automatically introduce note ornamentation to some notes in the current selection.
While this option will often produce unwanted results, if you want to make a section somewhat different but aren't sure how, you can sometimes find inspiration in what the automatic process suggests.
The parameters panel offers the most powerful pitch deviation tool available in Synthesizer V Studio. The Pitch Deviation parameter allows for the most customizable of pitch deviations, including all other types discussed above (transitions, vibrato, and ornamentation). Many users will refer to parameter-based pitch deviations as "pitch bends".
Pitch Deviation is just one of the available parameters in SynthV Studio. Parameters are represented as a graph, and in the case of the pitch deviation parameter, the values of the graph are added to the pitch line. For example, adding nodes to create a +100-cent line in the parameter panel will increase the pitch of notes in that area by 1 semitone.
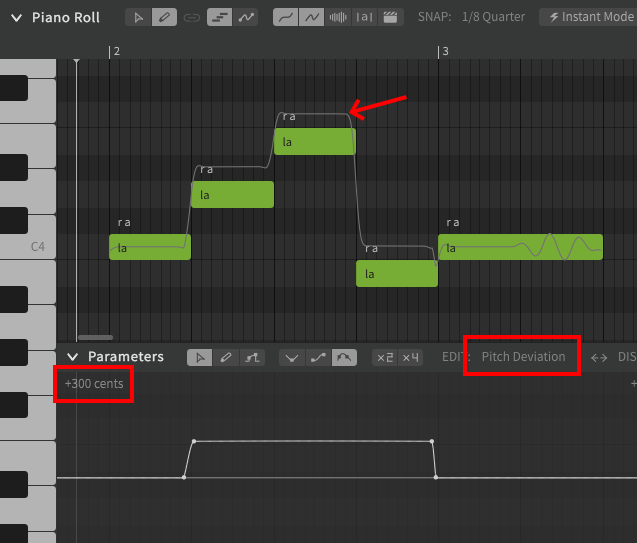
This example is clearly not very useful, since you could also just drag each of those notes up one semitone. A more useful example might be to recreate the first Note Ornamentation example from above using the pitch deviation parameter. You can also see in this example that I have increased the start of the note vibrato to match the note ornamentation example above, since we are no longer splitting the notes.
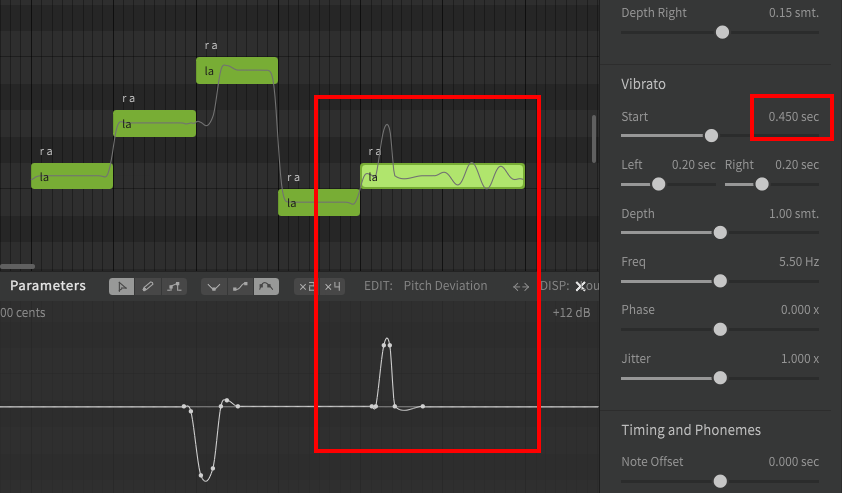
If you're following along you may have already realized that placing nodes or drawing with the pencil tool in the parameter panel is a bit awkward, since you are drawing the difference between the current pitch line and your desired line.
SynthV Studio has a much simpler tool for achieving the desired pitch line. Using the pencil tool on the piano roll will allow you to draw your desired pitch directly on the notes. Personally, I prefer to use the pencil tool to draw a pitch line in the piano roll, followed by fine adjustments using the pointer tool to move the individual nodes.
In this example I have added attack and release pitch bends and adjusted a transition by drawing directly on the piano roll with the pencil tool.
If you are finding that the pitch line is changing slightly after you finish drawing, consider disabling the "Simplify freehand-drawn curves" option in the settings panel. This setting is helpful for people with shaky hands, but you can always manually simplify the curves by selecting a cluster of nodes with the pointer tool and pressing alt
+S
.
The pitch deviation parameter can also be used to customize vibrato. If I want the vibrato on the final note to speed up as it approaches the end, I can simply remove the default vibrato and draw the shape I want.
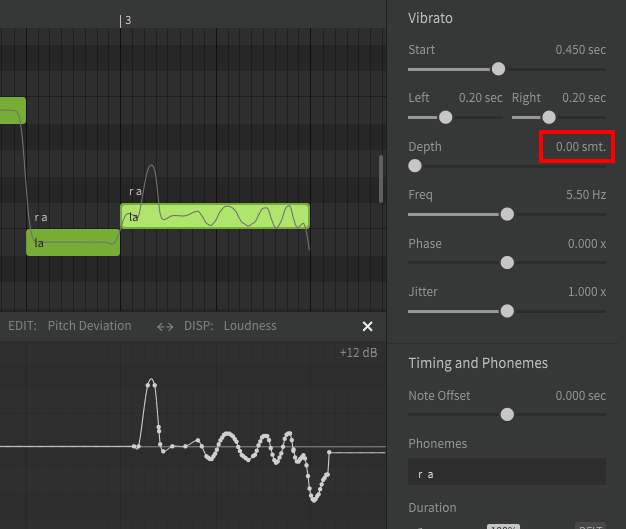
As you can hopefully see from the above examples, the pitch deviation parameter gives the user total control over the pitch line. You might ask "okay, I can draw, but you haven't told me what to draw", and unfortunately the answer is that there is no one correct way to use these tools.
It is up to each user to determine which pitch bends sound best in each situation, and there is no one rule or answer that will apply to all songs or situations. Just because I showed an accelerating vibrato frequency in the last example doesn't mean that's the best use of vibrato in the majority of situations. Try a variety of different things and decide what suits your own musical style best.
That said, this is not the last chapter of the guide, and the remaining chapters cover features that could be extremely helpful in answering this question. I think it would be a mistake for me to try and tell you how your music should sound, but if this guide and the next chapters can help you find that answer for yourself, I'll consider that a success.
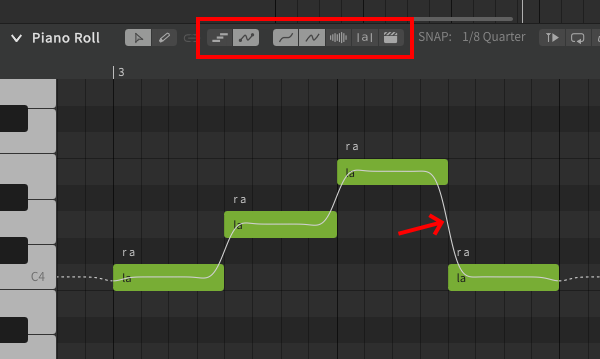
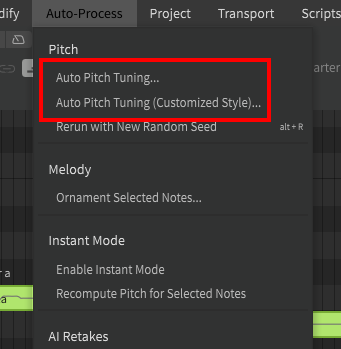
Auto pitch tuning is one of the automation functions available in SynthV Studio. The "Customized Style" option offers additional customization sliders for Pro edition users.
Executing auto pitch tuning will use the AI engine to add pitch deviations to the parameters panel for the currently-selected notes. These pitch deviations will be different based on the currently selected voice database, and are based on machine learning analysis of the voice provider's singing style.
Executing auto pitch tuning on notes will overwrite any existing pitch bends you have added to the parameters panel for the selected notes, and will set the vibrato depth for all selected notes to zero.
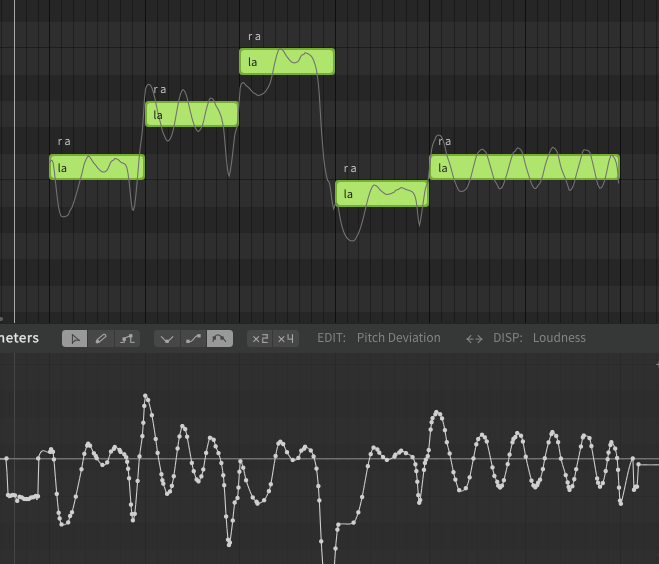
The example above is the result of running auto pitch tuning with an expressiveness setting of 100 and Mai as the selected voice database. While the pitch line may seem to be deviating very far from the actual notes, it still does not sound out of tune or incorrect. In this case the engine has attempted to mimic the singing style of the Mai's voice provider and done a reasonably good job of creating realistic-sounding output.
In some cases the pitch deviations added by auto pitch tuning will be too drastic, in which case rerunning the process with a lower expressiveness setting can help. The "Customized Style" option also offers Pro edition users sliders for vibrato and overshoot, which can help to adjust the intensity of vibrato and how far past a note the pitch line goes during transitions.
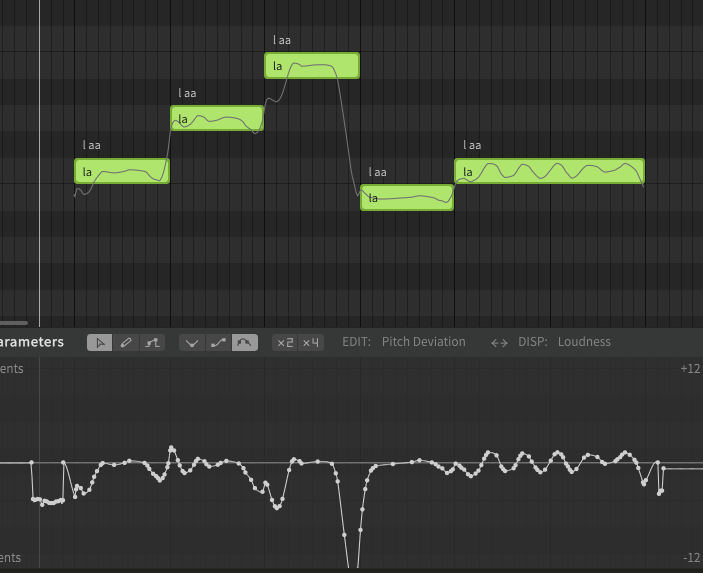
This second example uses Solaria instead of Mai, and a lower expressiveness setting of 50.
There are multiple different ways to use auto pitch tuning to your benefit:
Auto pitch tuning can often generate pitch deviations that do not match your desired sound, or even completely unwanted results. Despite this, it can be a valuable tool when used correctly and in the right circumstances.
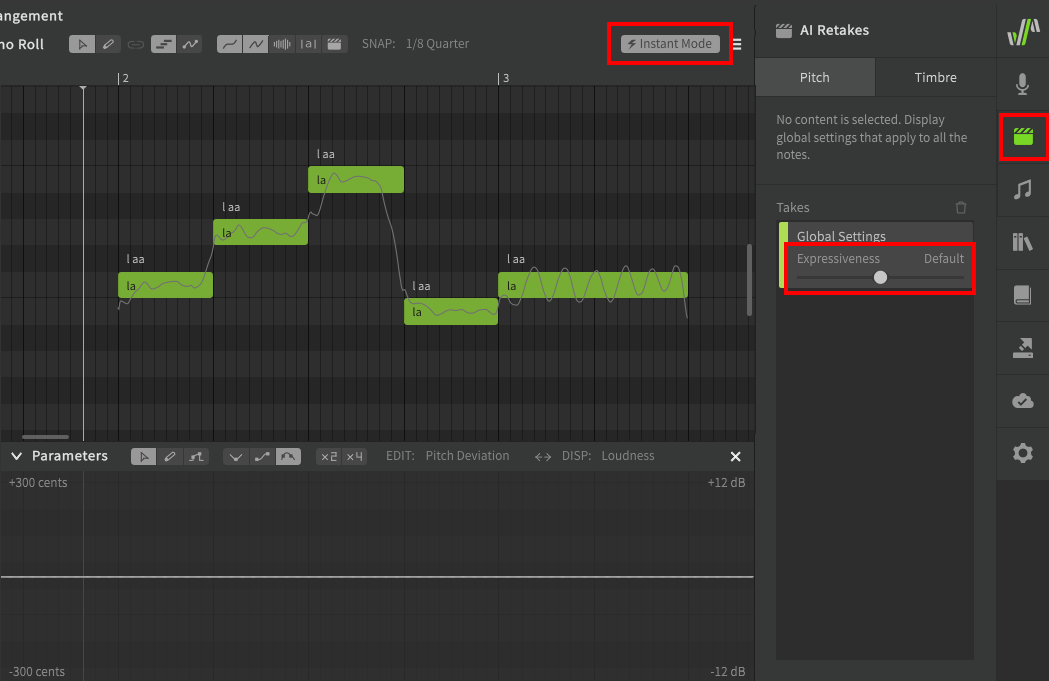
While Instant Mode is active, auto pitch tuning will be run on notes as you work.
Instant mode affects the entire project, and behaves very similarly to auto pitch tuning, with some main exceptions:
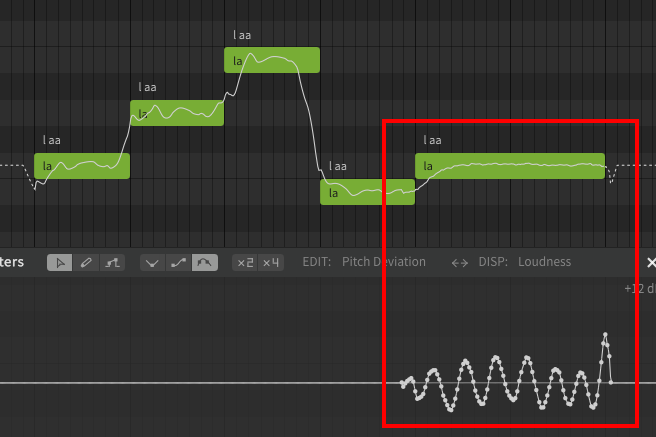
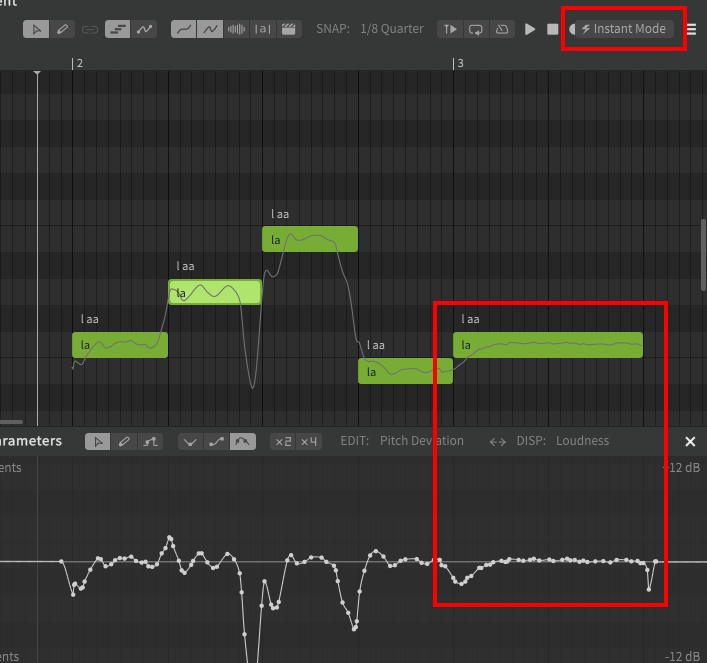
Since the pitch deviations from instant mode are applied separately from the parameters panel (similar to the default transition and vibrato settings), the only way to remove vibrato is to draw over it. This will create a curve in the parameters panel which cancels out the pitch deviations added by instant mode.
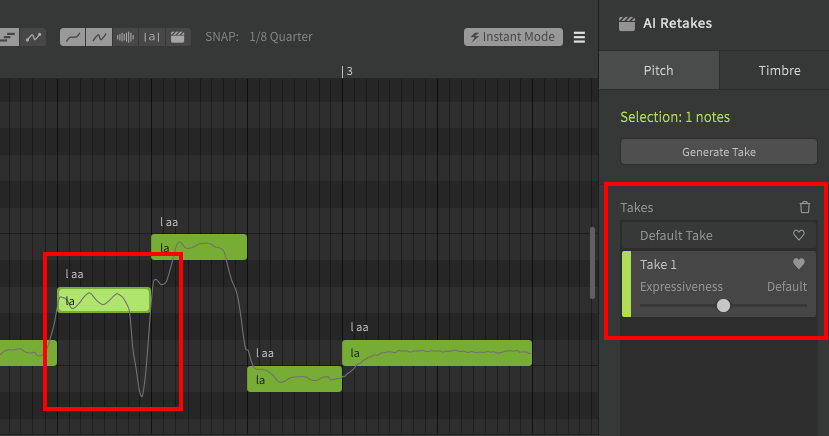
AI Retakes can be generated while instant mode is enabled, which allows you to cycle through multiple different generated results for a specific note. Notice how the pitch line for the selected note is different from the previous example when using a retake.
Disabling instant mode will cause all of the "invisible" pitch deviations to be applied to the parameters panel.
Notice how the pitch line in the piano roll does not change compared to the previous example, and the manual changes from previous steps remain. Additionally, the spot where we overwrote the vibrato has become flatter in the parameters panel, which is what we should expect by the previous parameter curve cancelling out the instant mode vibrato (which has now been combined with the parameter curve).
Instant mode can be a bit difficult to use, however like auto pitch tuning it offers a lot of potential when used correctly, and the AI Retakes feature can be extremely helpful in creating specific effects (such as vocal fry) depending on the voice database being used.
AI Retakes can also be generated for timbre, however this is separate from the pitch-based retakes that require instant mode, and timbre retakes can be generated even with instant mode disabled.